Support the Human Restoration Project and help transform education for the better! Your generous donation will enable us to provide Creative Commons, open access resources, and high-quality classroom materials that empower educators and nurture human-centered learning in our schools.
Act now and help us restore humanity to education!
Have you modified this resource for a different age group, activity, content area, or with other improvements? Contribute your remix!
submit a remix
Make an edit? Your input and designs create human-centered practices which fuel our movement for change. Upon approval, your credited remix will be published under a Creative Commons license.
Thank you! Your submission has been received! We will be in touch with any questions.
Oops! Something went wrong while submitting the form.
A protocol for utilizing design thinking to plan experiential projects.
video overview
overview & purpose
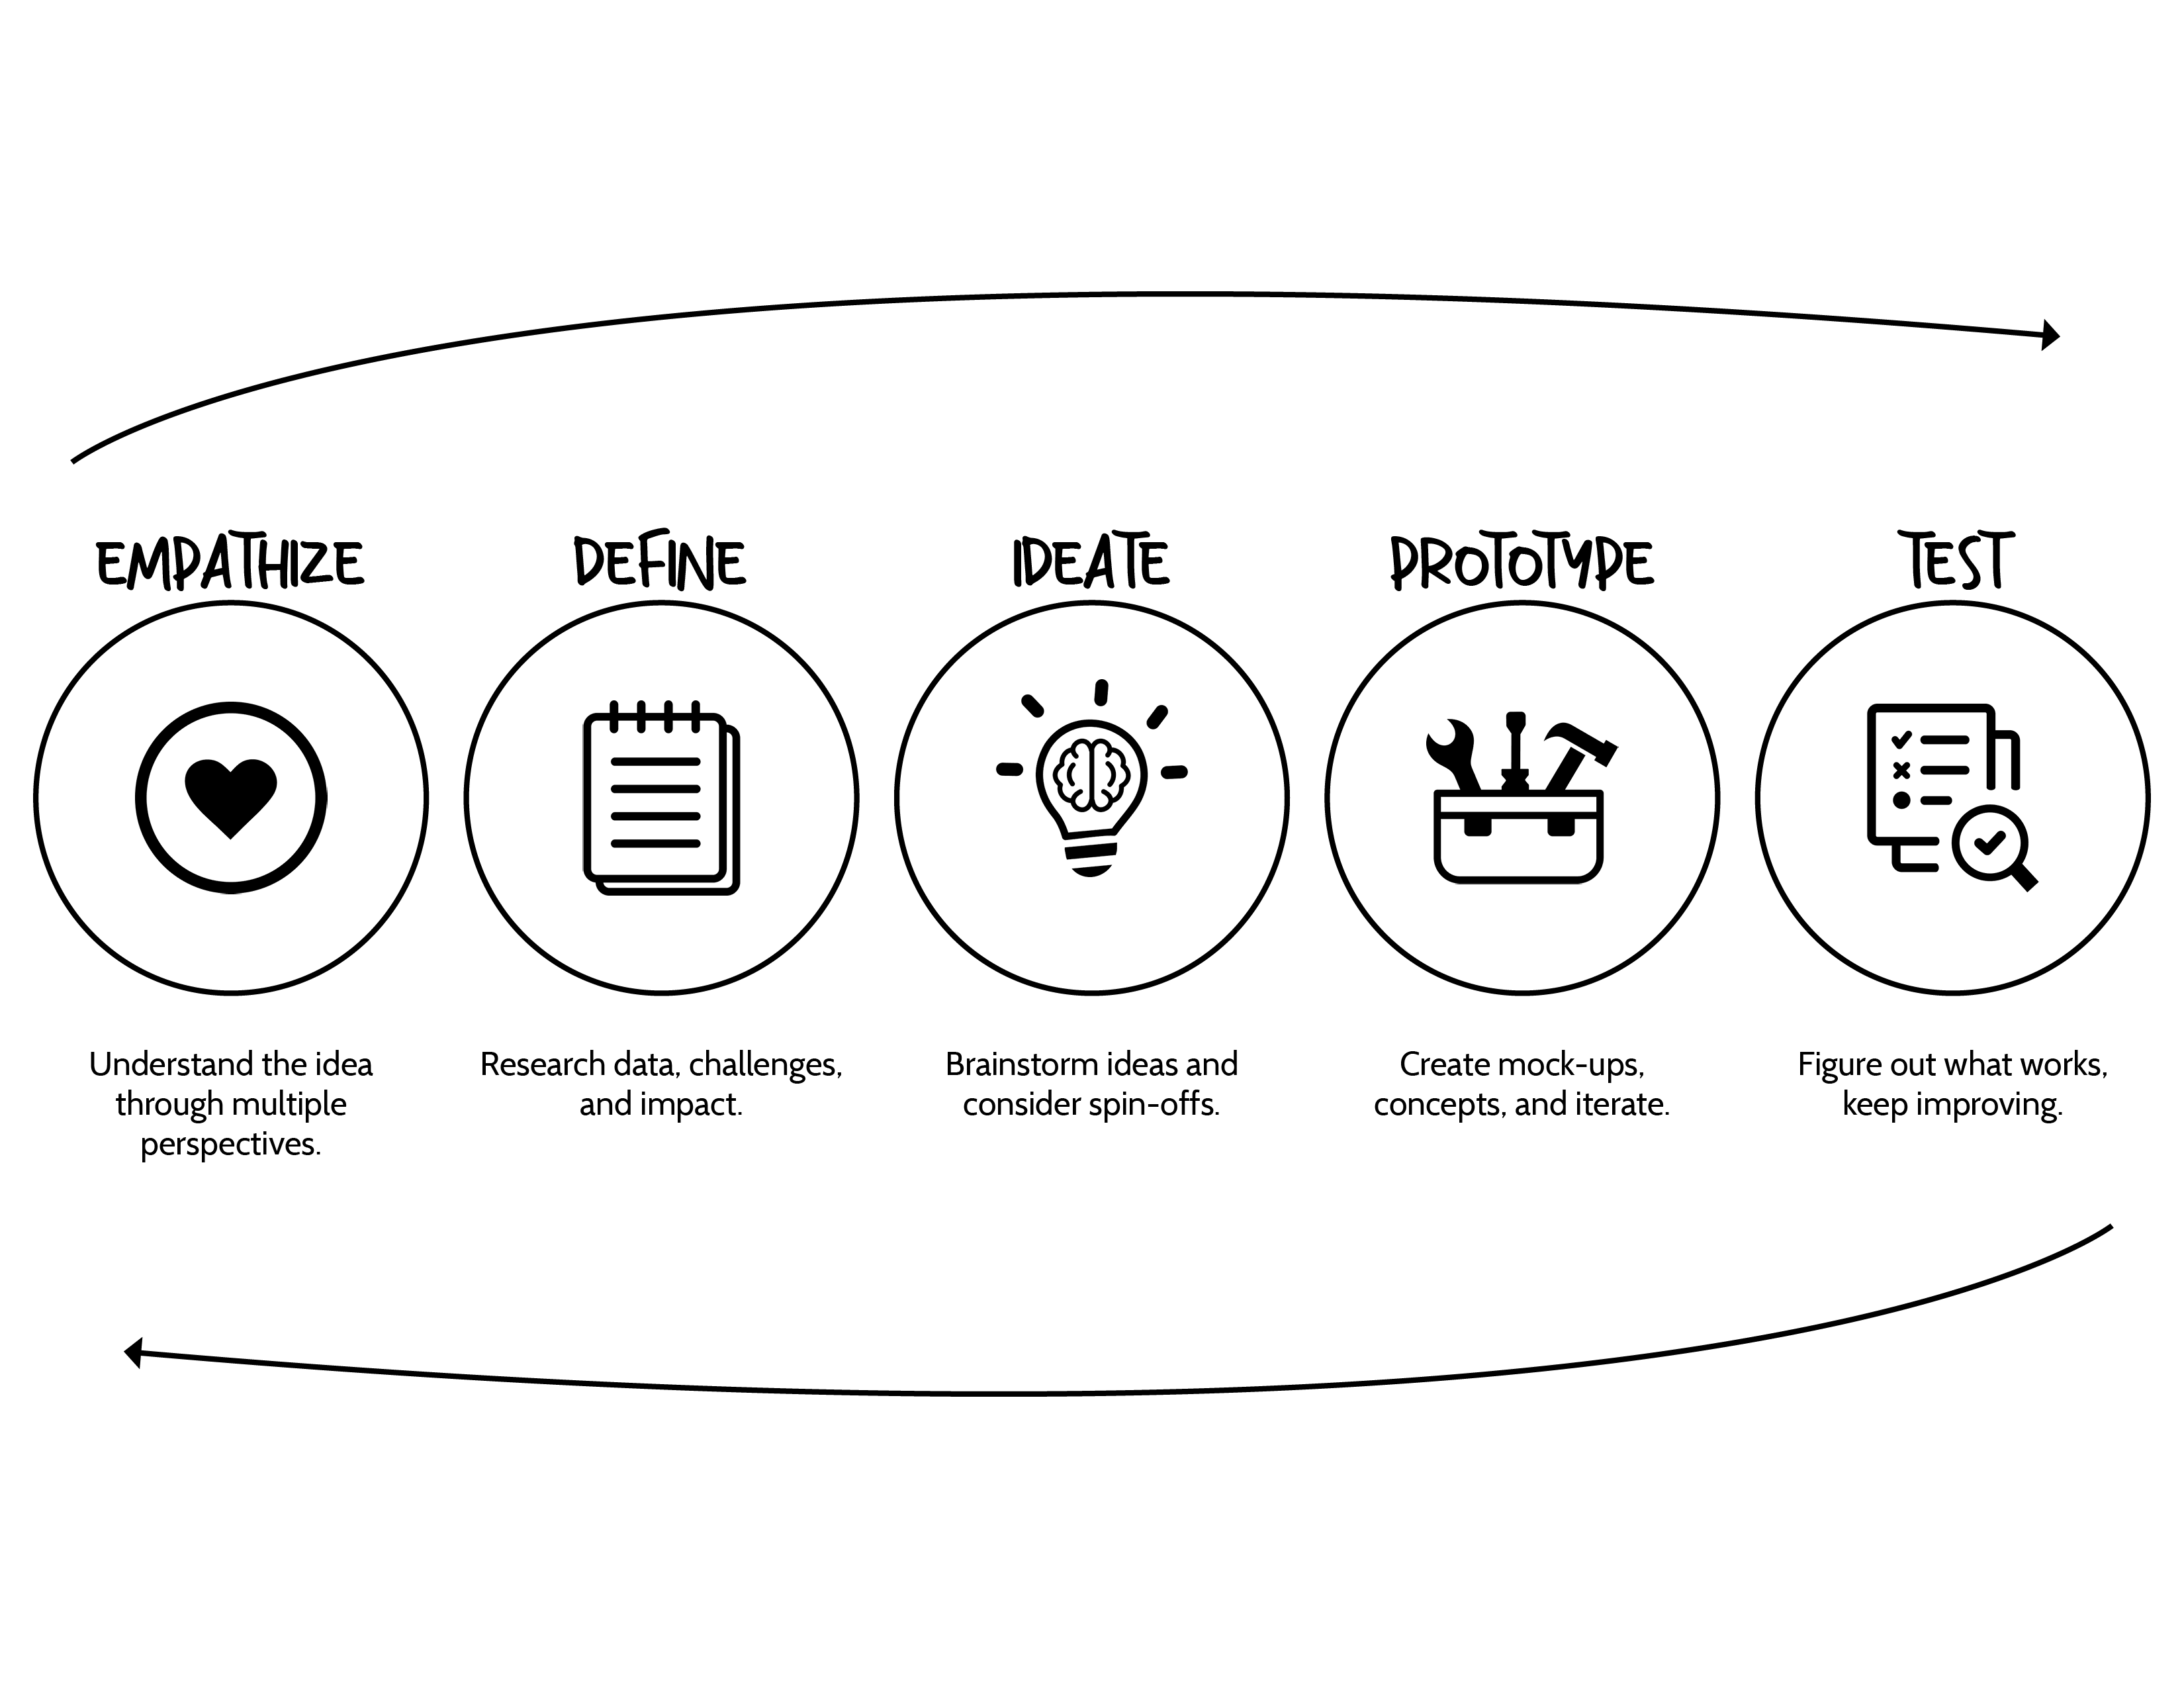
In design thinking, we utilize five steps for working toward a solution. It’s an iterative process that takes on a challenge with real world, authentic implications. In this document, we'll walk through each step of the design thinking process to explore designing projects.
No items found.
educator notes
The design process never ends! And, that means improvement never stops for students or for you. As you work through your project, you’ll probably have some hiccups. It’s up to you to reflect, improve, and remediate. And, note, not everything will be perfect this time (nor will it ever). We, as educators, learn through experiential learning just like students. We simply take what we now know, and apply it to future work!
Don’t be afraid of failure. PBL takes risks, assumes failure, and has a rather steep learning curve. Invite others in, reaffirm yourself from your student’s work, and spread experiential learning. Students around the world need you!
lesson / activity
Pictured: The design process.
Empathize, Define, and Ideate
The more student, parental, communal, school (all staff, not just teachers), and worldly connection your project has, the more inherently authentic it will be. The community serves as not only a springboard for garnering interest, but as the experts for planning, developing, and providing feedback for your project. Note: experts are not limited to adults! Even if it’s only a few students, focusing a project on their expertise will provide a huge motivational boost to the entire class.
Survey your students. Figure out their interests and what they’re good at. Send out a parent letter asking for what they’d be willing to showcase to the school. Then, think about what and who exists in your local community. In the box below, write all of this information down.
The best tasks are those that are authentic.
In order to frame your mindset on designing a strong project, we need to think about real issues in the real world. What do students care about?
With each student, have them choose their top 3 activities from past and current lessons. Have them brainstorm a list of questions based on that topic. These questions should be broad, overarching ideas that attempt to remedy real world problems.
ex. How will we feed the growing population of the world? ex. How can our school promote a positive environment? ex. What products could help us solve the issues of climate change?
Narrow down the question.
The more ideas students think up - the easier this whole process will be! Now, we’ll begin thinking about what to do with those questions. To do so, we may need to narrow down the question. For example, instead of “How will we feed the growing population of the world?”, we might consider “What near-future inventions will feed the growing population of the world?”
These specific questions can help add context and relevancy to the challenge. Have students modify their questions. Consider the following.
Current events
Recently released novels (fiction and non-fiction)
Events happening at your school or in your student’s lives
Local organizations and their specialties
Personal experiences you’ve been heavily interested in
Your content’s applicability
Choose something to start!
Now that you’ve started to think about what question you’re trying to answer and made some connections, have students rank their concepts according to interest. Have them strike out ideas that are simply not resonating.
ex. What future inventions will we feed the growing population of the world? ex. How can classroom programs help our school promote a positive environment? ex. What products could help us solve the issues of climate change?
Now, let’s start fleshing out this project.
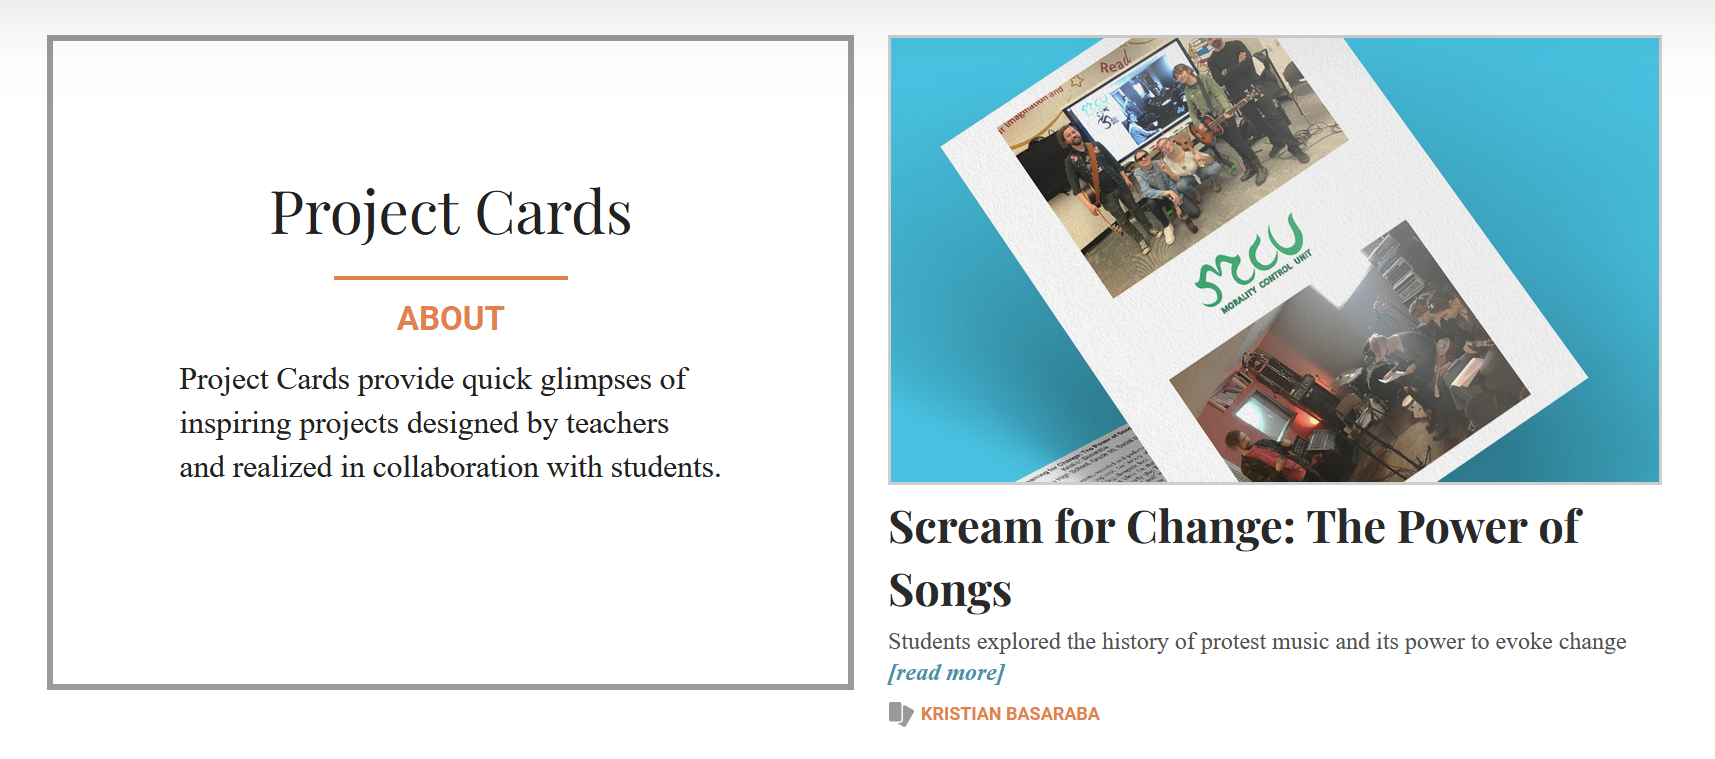
Pictured: A screenshot of High Tech High's Project Cards, showing "Scream for Change: The Power of Songs."
Have students, either with you, individually, in-pairs, or as a whole class, research potential project ideas for each of these concepts. Use resources like High Tech High's Unboxed project database to spur ideas. Have students write and propose a project that will take a set number of time over the coming weeks or months. Include:
The question they’re answering
The idea behind the project
Why this project matters
Who their audience will be
What they’re excited about in this project
Example Projects
Designing a project is mentally taxing! Don’t be afraid to seek out additional resources. Be careful not to design a project and all of its steps. You’re starting to venture towards just doing a class project. Our goal is for students to learn while doing the project - which involves them figuring out many things by themselves!
Here’s how this project may look so far:
A group of students are all involved in their local theater club. Two of these students stated that they were very interested in the lessons regarding the environmental impacts of climate change, but aren’t sure what kind of project they want to do with it.
You invite one of the local theater club members to help you plan what elements would go into a theater performance, and compile all these resources. You come to the guiding question: How can we put on a great performance that informs people about disastrous weather effects of climate change?
Now, this group of students all decide they want to work with each other: they all enjoy the idea of the task (theater) and the concepts explored (climate change).
A well-chosen project will be inherently interesting to the majority of students. However, it doesn’t hurt to increase their buy-in through an interesting experience. Perhaps contact one of your connections for a demonstration, take a field trip, Skype with an expert, have students present information, perform an experiment or more!
Keeping the Project Interesting
A common misconception of experiential learning is that all instructional time is used for working on a project. This is true - but that truth does not imply a teacher does nothing but watch students work the entirety of the project. Instead, you need to structure lessons, reflections, activities, field trips, speakers, peer reviews, mini-projects, and more. This is to “rekindle the flame” of the project. It’s likely that students will burnout after the initial rollout of your project - it’s up to you to keep them going with interesting things!
The key is that everything here relates to your project. Lessons, even if lecture-based, will have buy-in if they are authentic and in relation to your project. We’re applying knowledge, not just drilling it!
Brainstorm each of the following. These all don’t necessarily have to be scheduled - just pull them out when motivation runs dry. And it’s perfectly fine if these activities don’t relate to all student projects. You’re creating a community of learning where students become involved in each other’s success.
Field Trips
Lessons
Speakers
Mini-Projects (ex. a 1-2 day collaborative art project, where students present a basic concept, which is then put on display)
Peer Review
Reflections
Staying Organized
Now, to organize all this!
You’re well on your way to rolling out this project. But, let’s make sure that you and your students can make sense of it. This doesn’t need to be anything too complex - in fact - a mark of a strong demonstration is simplification of a complex concept.
We recommend creating a brief document (an example is in the next section) which summarizes the following, which should be gone over with your students (either through a lecture or activity):
The question they’re answering
Why this project matters
Who their audience will be
The guidelines (ex. deadlines)
The design process (for their planning and as a roadmap). You can set deadlines based off of different elements of the design process (i.e. “By January 20th, you need to have research done on your concept, with at least 2 sources and a page of information.”)
How will I keep track!?
First, your guidelines can be as strict or narrow as you’d like. The more enclosed the project, the stricter the guidelines will be. Simple guidelines are best: deadlines and components (must involve something written, something presented, etc.).
Second, take each step with each group individually, while paying attention to the entire classes’ progress. Don’t be afraid to roll out each step to the entire class at once, as they all reach that goal.
Students will most likely diverge from your original ideas. They’ll come up with creative solutions beyond what you originally thought. This is fantastic - that’s the entire point of experiential learning! Let them roll with it!
Project Proposal
What is the topic of your project? What are you learning about?
What question are you looking to answer?
Why would anyone care about this project?
Who is your target audience? Who is this project for?
What are the specific things that you’ll include in the project? When will they be done?
Community Feedback
We’re almost ready to go live with our project, but more feedback can never hurt. Invite students and other staff members to engage in a community feedback session.
Have students prepare short presentations that goes through the general information on the previous page. This has three major purposes:
For the group to provide feedback on projects.
Other members of the community may collaborate and/or learn from your ideas.
Students will be able to practice and perfect their presentation skills on this subject.
After the 1-2 minute presentation, allow substantial time for feedback:
Time for peers to ask questions on what they’re confused about (not suggestions!)
Time for peers to discuss elements of your project with each other, including what they liked and what needs improved
Inclusion of either written or electronic feedback to submit positive feedback and critique
At this point, have students revisit their project proposal. They should include updates based on the feedback received in this session.
Modeling
It’s vital that you prepare an example of what students will be doing. Although this is a solid amount of additional work, this will allow you to see additional things you need to explain, and exemplify each step to your students while instructing.
Prototyping & Testing
Project-based learning requires a lot of effort before being rolled out. The good news is that it opens a lot of free time during the actual classes. So often, teachers are so stressed out during their lessons that they never foster relationships with their students. PBL allows for this, since your only major role during the Impact process is supervision.
Furthermore, collaboration is key. The more teachers you can pull in to help - the easier this entire process will be. And, in turn, the more your students will see applicability in their learning.
Checking in with Students
Throughout the project, it’s important that we stay on top of what students are doing. We recommend using a simple spreadsheet (i.e. Google Sheets) to track their progress. Simply have multiple check-in dates scheduled, with individualized/group-based goals written for each group. At each check-in date, call each group forward and give them a goal to work on. If your project is hard to manage or needs even more tracking, try out a tool like Trello - a freemium resource used in real workplaces to track large numbers of number parts. This is a great resource to teach to students as well!
Pictured: A Google Sheet documenting a group's progress over time.
Group Work
Many students prefer to work in groups - but not all. It’s up to your project and planning to figure out how to give everyone a unique, worthwhile role that fits their preference. We encourage you, if using groups, to assign specific roles to each student (ex. a leader, communicator, editor, etc.)
Pictured: An example Trello board.
Portfolios
An easy way to assess students is by having them compile what they’ve learned in a portfolio. Throughout the Action process, students have been reflecting and documenting their learning. Add these to an ongoing portfolio for assessment at the end of the year. Then, include all of the documentation from this Impact process. These portfolios can be used to not only assess student learning, but help organize your feedback throughout the year.
Reflections
It’s important to incorporate as many reflections as possible into your projects. Reflections aren’t just feedback - but also looking towards the future. Encourage individual and group feedback, written as well as verbal. You can use this data to assess students, change up projects, or rethink future ideas.
What about the final product?
It becomes difficult to figure out how to subjectively gauge your final product. Are you assessing the design process or just the product at the end? One suggestion we have is to make reflections a majority component of the grade. Reflections are easier when work is getting done, and learning can happen through failure easily with reflections. Another suggestion: allow the public to grade the final product (through a celebration of learning, or through an expert. The process is more important than the product.
Remediation and Failure
Failure must be normalized for the Impact stage to work. It is normal to fail in real projects, so it is safe to assume that in school - students must now how to fail well. Don’t make your project due on the last day of school. There must be a serious amount of remediation time for students to correct their work - especially if you can do so before a celebration of learning.
This process of failure and improvement should happen multiple times during the project. The more this is exemplified with students, the more it will be normalized, and the more learning that will occur. It’s inevitable that with structured review, critique, presentations, and more - a student’s final product will improve immensely. The bonafide example of this is Austin’s Butterfly.
Utilize the Prototyping step to conduct many check-ins, help build student portfolios, work directly with students, complete reflections, and complete steps toward a celebration of learning.
Displaying Student Work
Students want to know their work matters. Authentic work will be presented or displayed. If your product is physical, work with your local community (museums, galleries, businesses) to house student projects. This connection will prove invaluable for bolstering an authentic audience for your students.
Furthermore, present student work around your school. The focal point of your hallways can be very telling for what you value. Is the primary thing noted on your walls rules from the handbook or blank, bare walls? If so, think about what message this communicates to students. The more creative ways you display work around your school, the more academic buy-in you’ll have.
Celebrations of Learning
A simple way to garner an authentic audience is to have a biyearly or yearly invitation to your student’s families and local community to view student work. Have students take the lead: create advertisements, prop up displays throughout the school, raise money for project funds, have a music concert - what have you! Let students present their work in a real moment of learning.
Facilitation
What am I supposed to be doing while students work?
Build relationships, check-in with students, redirect them, and help them with their work. Also: catch up on planning, grading, and take breaks. It’s unrealistic to expect students to work 100% of the time without ever socializing, walking around, or “goofing off.” And - it’s unrealistic to think you would work 100% of the time either! Do what is best for you during that time frame. An open-ended project will be alive with energy: some students will be hard at work, others will be moving around, some will be simply hanging out with their friends. Be transparent with students in utilizing the space in proper ways: such as designating quiet work times or spaces for relaxing. That way, students won’t interfere with one another’s ability to focus.
Some of my students have no interest in this project.
No matter how well you research and roll out these projects, every single student is not going to be interested. If you want real student choice, you need to allow them to opt-out to something different. We recommend a simple template where students go through a similar process of choosing the initial project. Give them basic guidelines on what you want to cover, then let them express them in any way they want.
It is not advised to make a project for them. This is putting way more work on you, and not teaching your students the valuable skill of proposing alternatives. And, you might think that many of these students won’t put forth that effort. If time after time students simply refuse to participate, we recommend reading up on Restorative Justice, reflecting on that student’s home experience, what resources you can provide to them, and meeting with administration, family, and them to try to solve the root issue of their problems, rather than forcing them into a project. Usually, if a student is refusing to work on school work altogether, there is trust that needs to be built or an underlying problem at hand.
Students are way off track when they should be working on a project.
The first time you introduce open-ended projects there are going to be mishaps. Students are rarely tasked in traditional school to manage their time authentically. We need self-directed learners - but how do we teach this? Well, the answer is simple: allow students to practice it - and it will be messy. Part of your goal as an educator is to incorporate enough reflections, check-ins, meetings, and more to constantly redirect students and have them take control of their own learning.
This means that students will likely not reach as much information as you’d normally throw in. However, they’re learning a lifelong skill rather than forgetting the vast majority of what you say in the upcoming year.